I’m preparing to teach a beginners’ stained glass class soon, and it has gotten me thinking again about the choice of construction techniques for building a window: Lead came (channel) or Copper Foil. Each method has its advantages and disadvantages, and these should always be considered when planning a project.

Mitered leads create a smooth tapered line around curved pieces of glass.
Full disclosure, before I go any further, I need to admit that lead is, by far, my preferred method for glazing. I love the clean, graphic look of a meticulously leaded window, and the work process is an enjoyable challenge. Even after years of production work, making leaded windows day-in and day-out, I still relish this kind of bench work: bending lead cames just so to hug the curves of a well-cut piece of glass, marking and mitering the ends of each piece to form delicate tapered joints or crisp right angles, soldering just enough to make them appear seamlessly smooth.

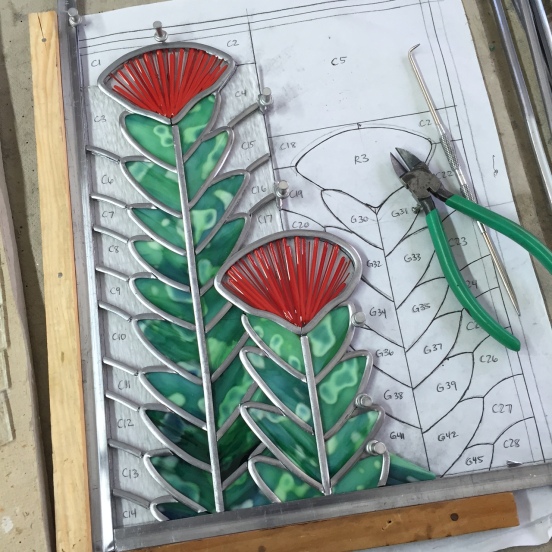
A leaded ornamental window in progress on the bench.

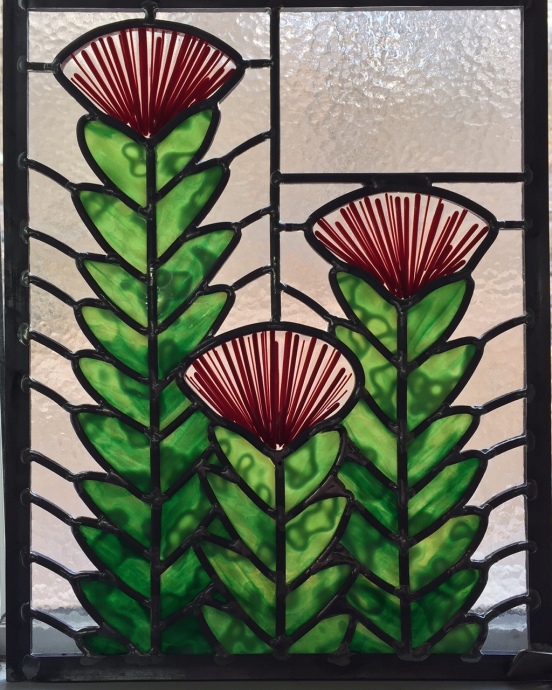
Detail of a leaded panel
Of course, the downside to using lead is that you have to putty it at the end. It’s usually messy and tedious, and is my least favorite part of the process. In spite of my dislike of the task of puttying, it’s a crucial part of the window’s functionality. Putty stabilizes the glass in the lead cames, helps to make the panel rigid, and creates a waterproof barrier that makes the window suitable for an architectural setting. A well-puttied window is made even more beautiful in the process. As each piece of glass is puttied, its edges become sealed and opaque, which gives a sharper definition to the light coming through Puttying also imparts a lovely dark burnished color to the leads, and protects them from oxidation by permeating them with a small amount of oil. I am almost always willing to undergo the temporary annoyance of having to roll up my sleeves and putty a window in exchange for reaping the many aesthetic and structural benefits of lead work.

Copper foiled mosaic-style panel
So why, then, would I ever use copper foil, let alone teach a class around it? The answer is simple. There are several advantages to copper foil that lead just can’t match. The first is versatility. If I’m working with a concentrated area of tiny piece, it’s often much easier to foil and solder them together, rather than fumbling with tiny bits of lead came that refuse to stand up or stay in place as you build. I can add a copper foiled section of detail to a leaded window, too, without compromising the overall look or structural integrity. Copper foiling is also perfect for lampshades and other three-dimensional construction, because the pieces can be made to conform to the shape of a mold, rather than having to lay in a flat plane. Most people are familiar with traditional art-nouveau style stained glass lamps, as popularized by Tiffany Studios, but modern artists are taking the idea in wonderful new directions. I’ve just recently started using instagram (@avglassart) and through it I’ve discovered some amazing abstract copper-foiled three dimensional lamps and sculptures from artists around the world.

Tiffany Lamps from the Neustadt Collection
(On a side note here, it’s a HUGE pet peeve of mine when people refer to any stained glass lampshade as a Tiffany lamp. Unless you know that the lamp was made by Tiffany studios, it should be called a Tiffany-Style lamp. Calling all shades Tiffany lamps is like calling all cars Cadillacs, but I think many people don’t realize it!)

Not a Tiffany lamp.
The second reason for using foil is visual. While leadlines are even and sturdy-looking, foil can create a delicate, almost sketch-like line. A careful craftsman can make both straight, skinny lines and also deliberately uneven ones, to lend a more expressive effect. There is a natural liveliness and movement to the line quality that is hard to duplicate in lead without a lot of extra manipulation. Copper foiling also offers the opportunity to create a sculptural look with solder. I’m working on a project right now that uses many different thicknesses of glass, and copper foil is helping me achieve the slightly rocky, mosaic-like surface that I’m going for. 
The third reason, which is the key to my teaching choice, is the sheer accessibility of copper foiling. It’s wonderfully simple for almost anyone to start doing as a hobby, with a minimal investment in tools. In fact, aside from sheet glass, everything that you need to get started would fit in a shoebox. An introductory class is enough for many people to get off the ground and running. The basic method is easy to learn, and first projects can be completed in a short amount of time. The other nice thing is that foil is very forgiving to beginners. Even if your glass cutting skills are still on the rough side, you’ll still be likely to make something that works, although the solder lines may be a lot more uneven than you’d like. Each project will look a little more refined as you gain more practice cutting glass, learning how to apply the foil smoothly, and running a nice even bead of solder.

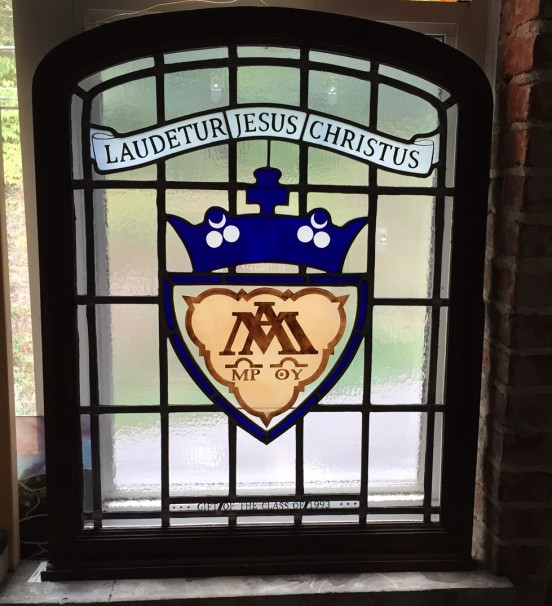
This panel uses a combination of techniques. It is leaded, but the blue sections are copper foiled together and treated as if they were single pieces of glass when fitted into the leads.
Even though I tend to prefer lead, as I mentioned earlier, I still find that copper foil is an integral part of my work, and I enjoy using both methods in tandem sometimes. It’s all about finding the perfect balance between structure and looks, and knowing what you want to make.